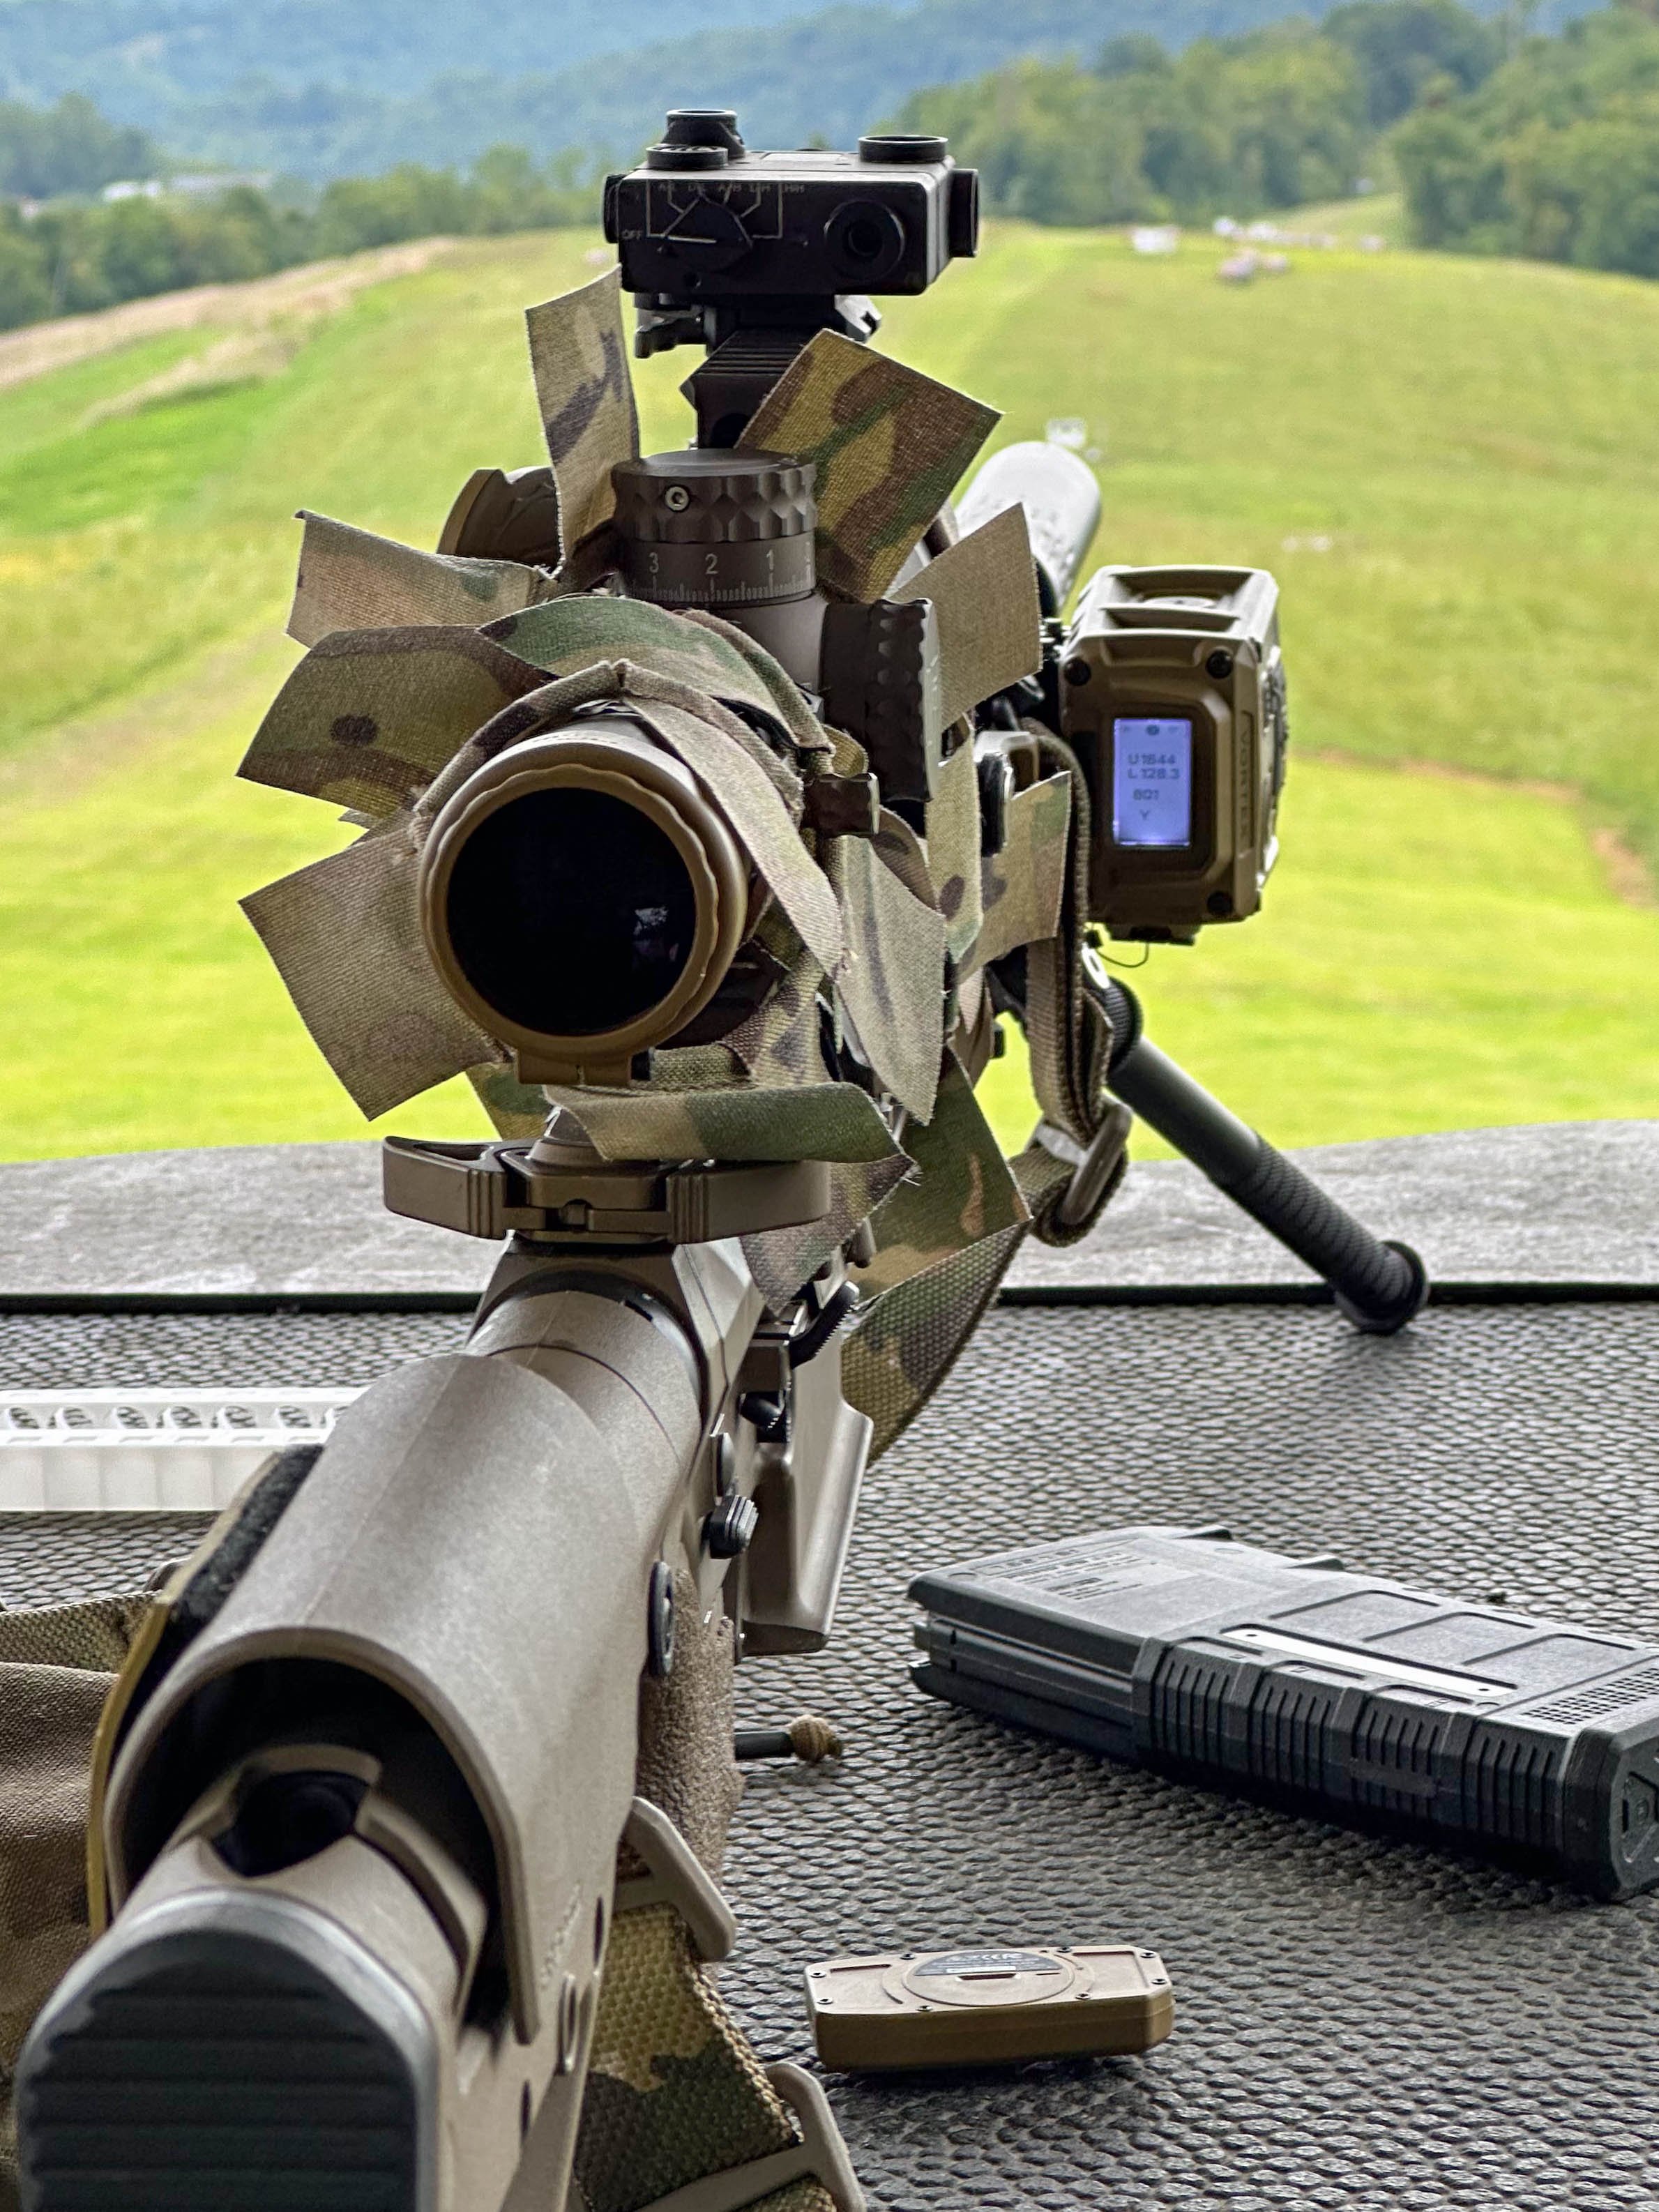
I’ve been lucky enough to spend some time with one of Vortex’s newest products, a rail-mounted laser rangefinder called the Impact 4000.
BLUF: it brings fantastic functionality to a much wider group of shooters with an accessible price and a somewhat hefty silhouette that’s packed with useful features.
Traditionally top-mounted using a diving board mount, I also really liked side-mounting the Impact
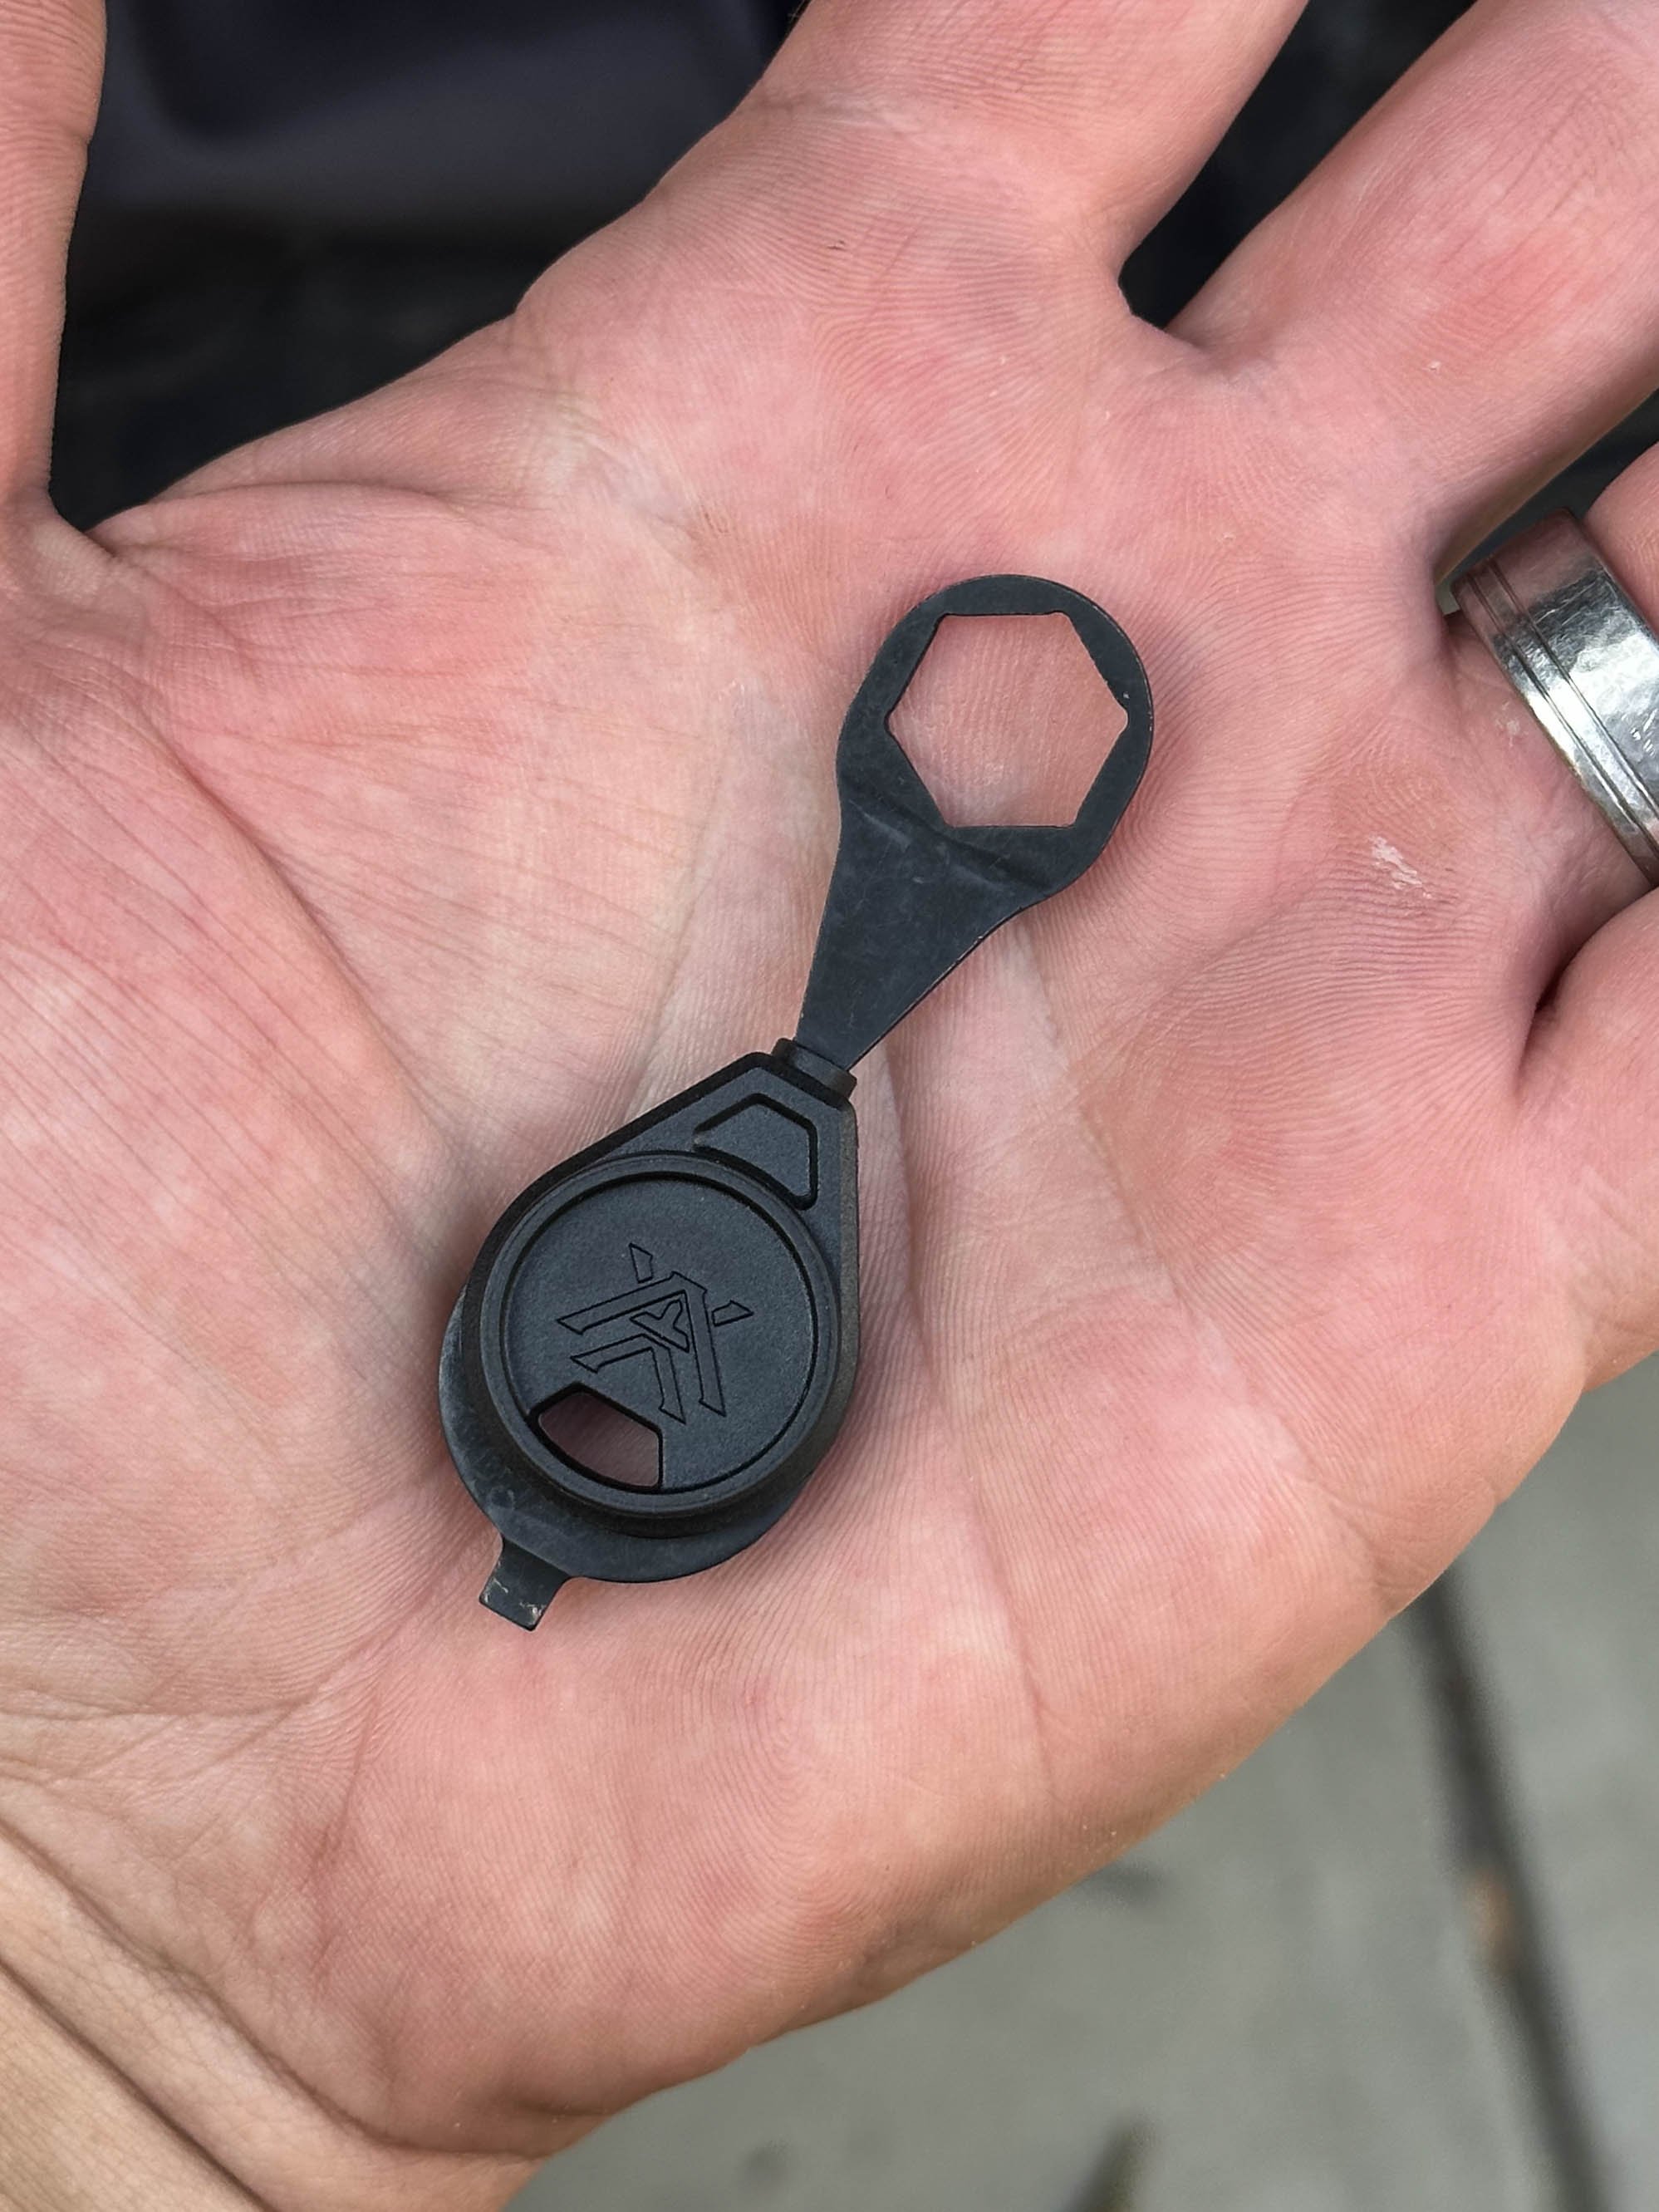
These can be found at dealers for $2k, and the box includes the pic-rail mountable unit, a bluetooth remote, a number of remote mounting plates, zeroing targets, a soft cover, and the most useless wrench possible (more on that later).
The 905nm ranging laser provides the shooter with distance to target; but with onboard inclinometer, digital compass and weather sensors providing enough input to calculate a full firing solution, you also get a MIL or MOA correction for the weapon it’s mounted to.
Laser returns came back quick, even on an open field in the distance without any reflective targets
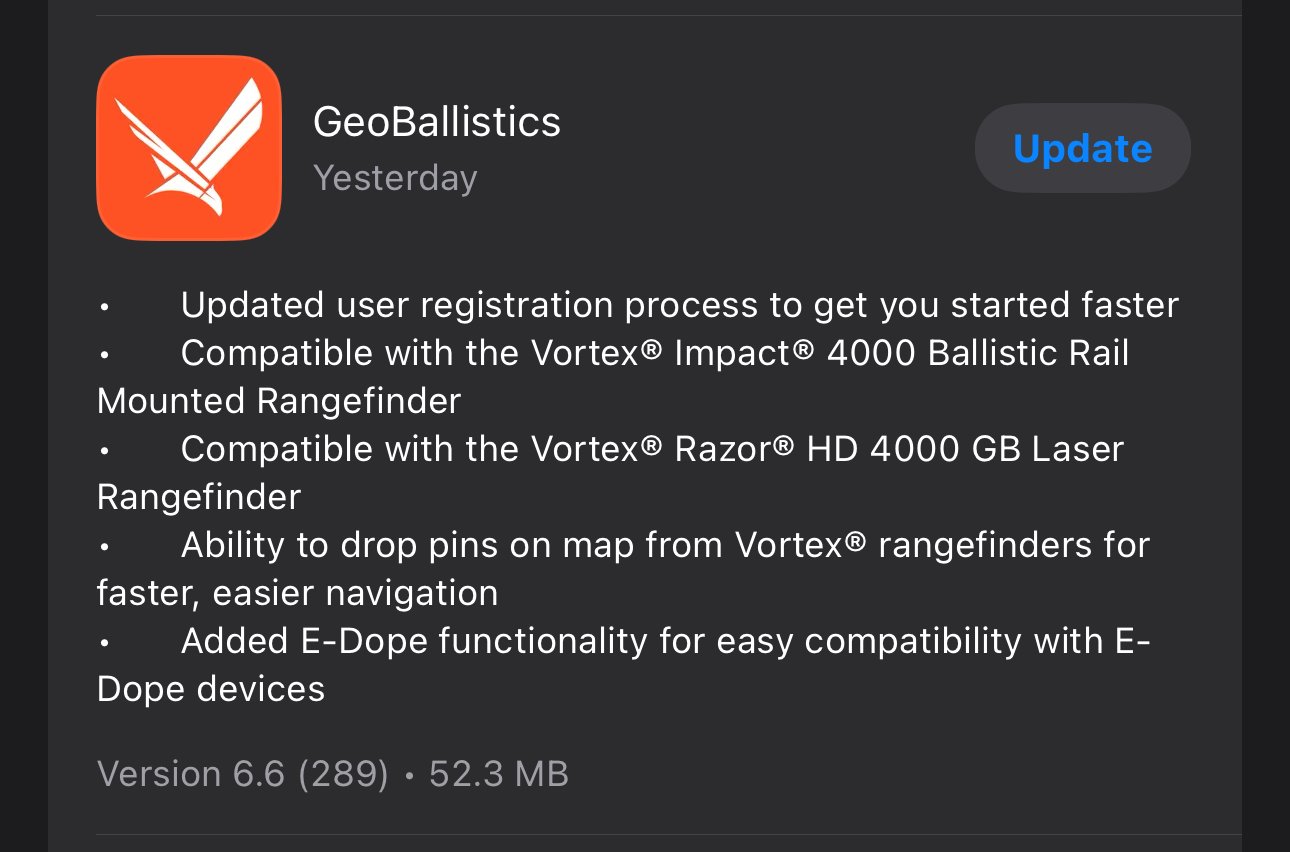
Before the GeoBallistics app was updated to include compatibility with the Impact 4000, you had to manually enter all rifle and ammunition details to dial in the ballistic computer. If you’ve done this in a Kestrel device or other ballistic calculator phone app, it’s really straightforward. Just make sure to look up your bullet’s length and BC online to have those on hand. It only took about two minutes to enter the details from my 6.5CM LMT with 140gr factory loads, and the corrections it calculated at the range were spot-on and very close to what I received from Hornady’s 4DOF.
As of 9/28, the GeoBallistics app has been updated to connect with the Impact 4000:
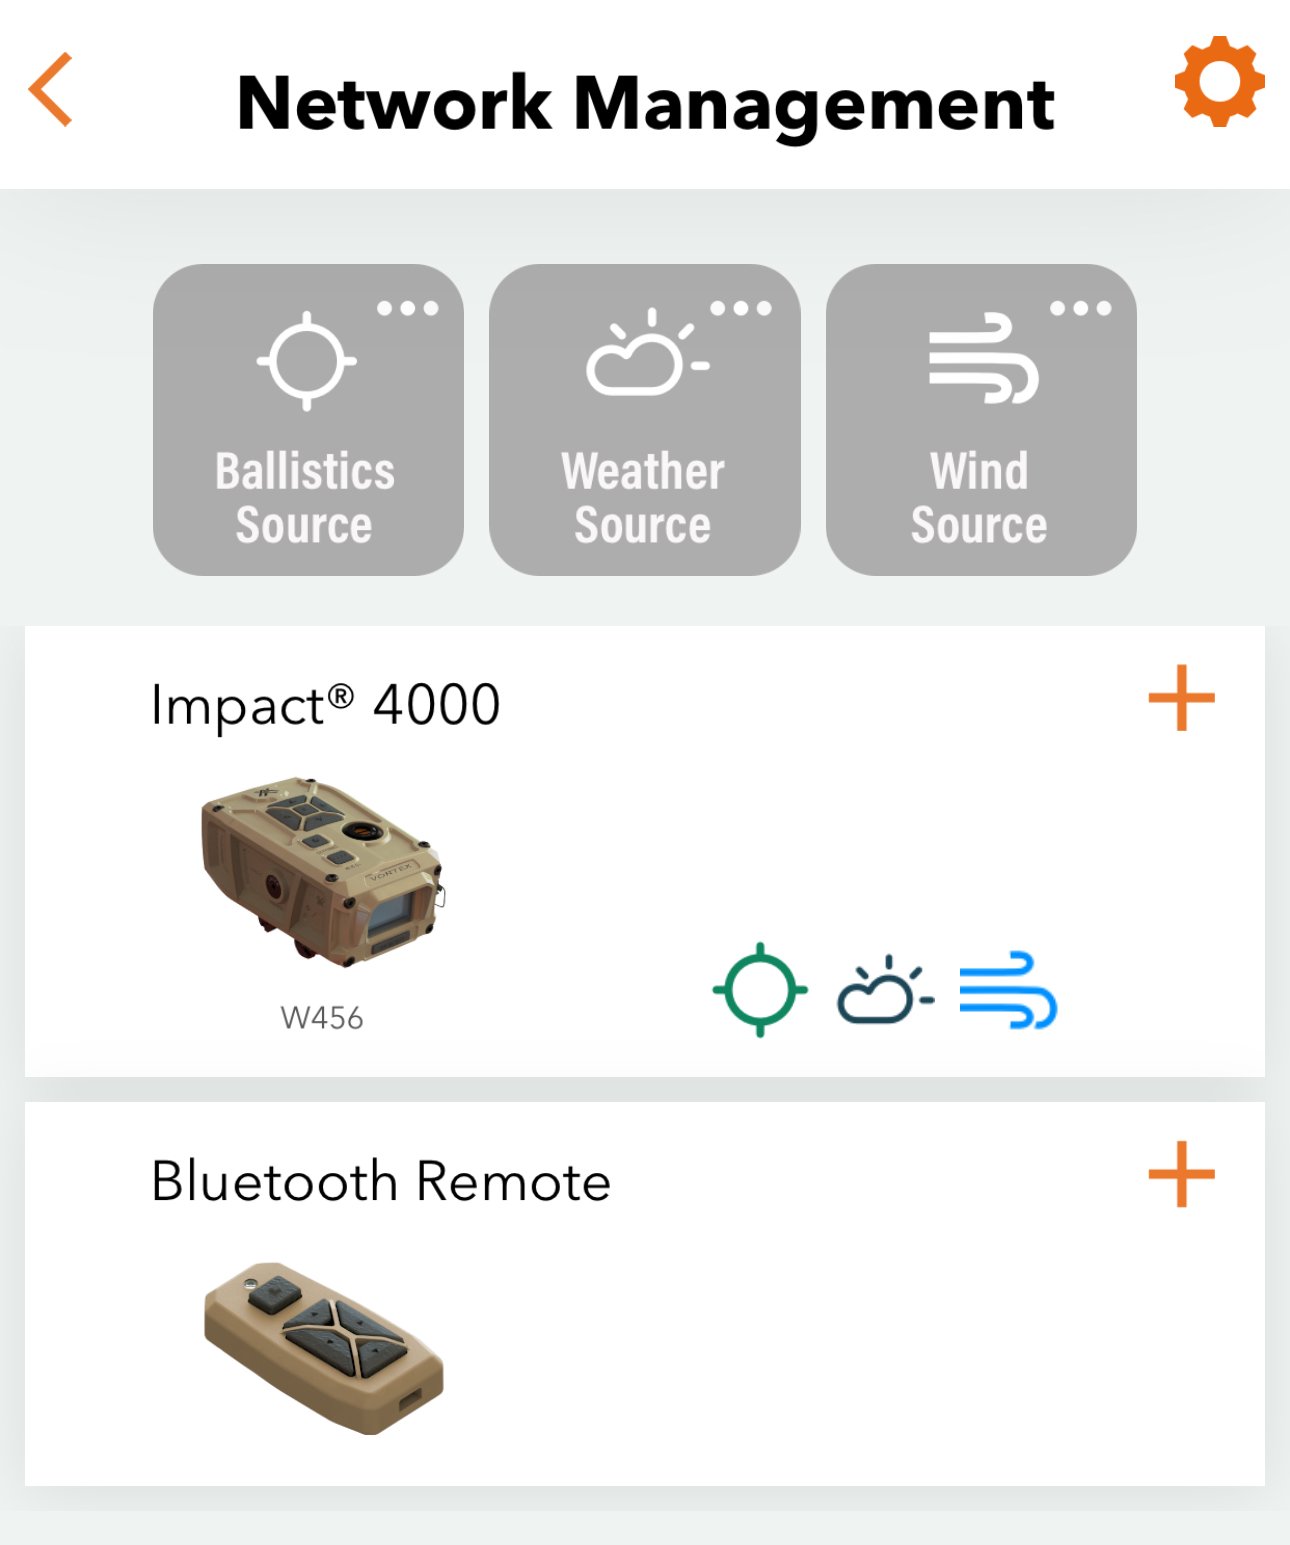
A secondary menu can be toggled to display an interface for entering a wind vector with a compass heading and speed. Then you’ll get L/R corrections alongside your elevation solutions. That’s accessed with the “Wind Bearing Capture WBC button”.
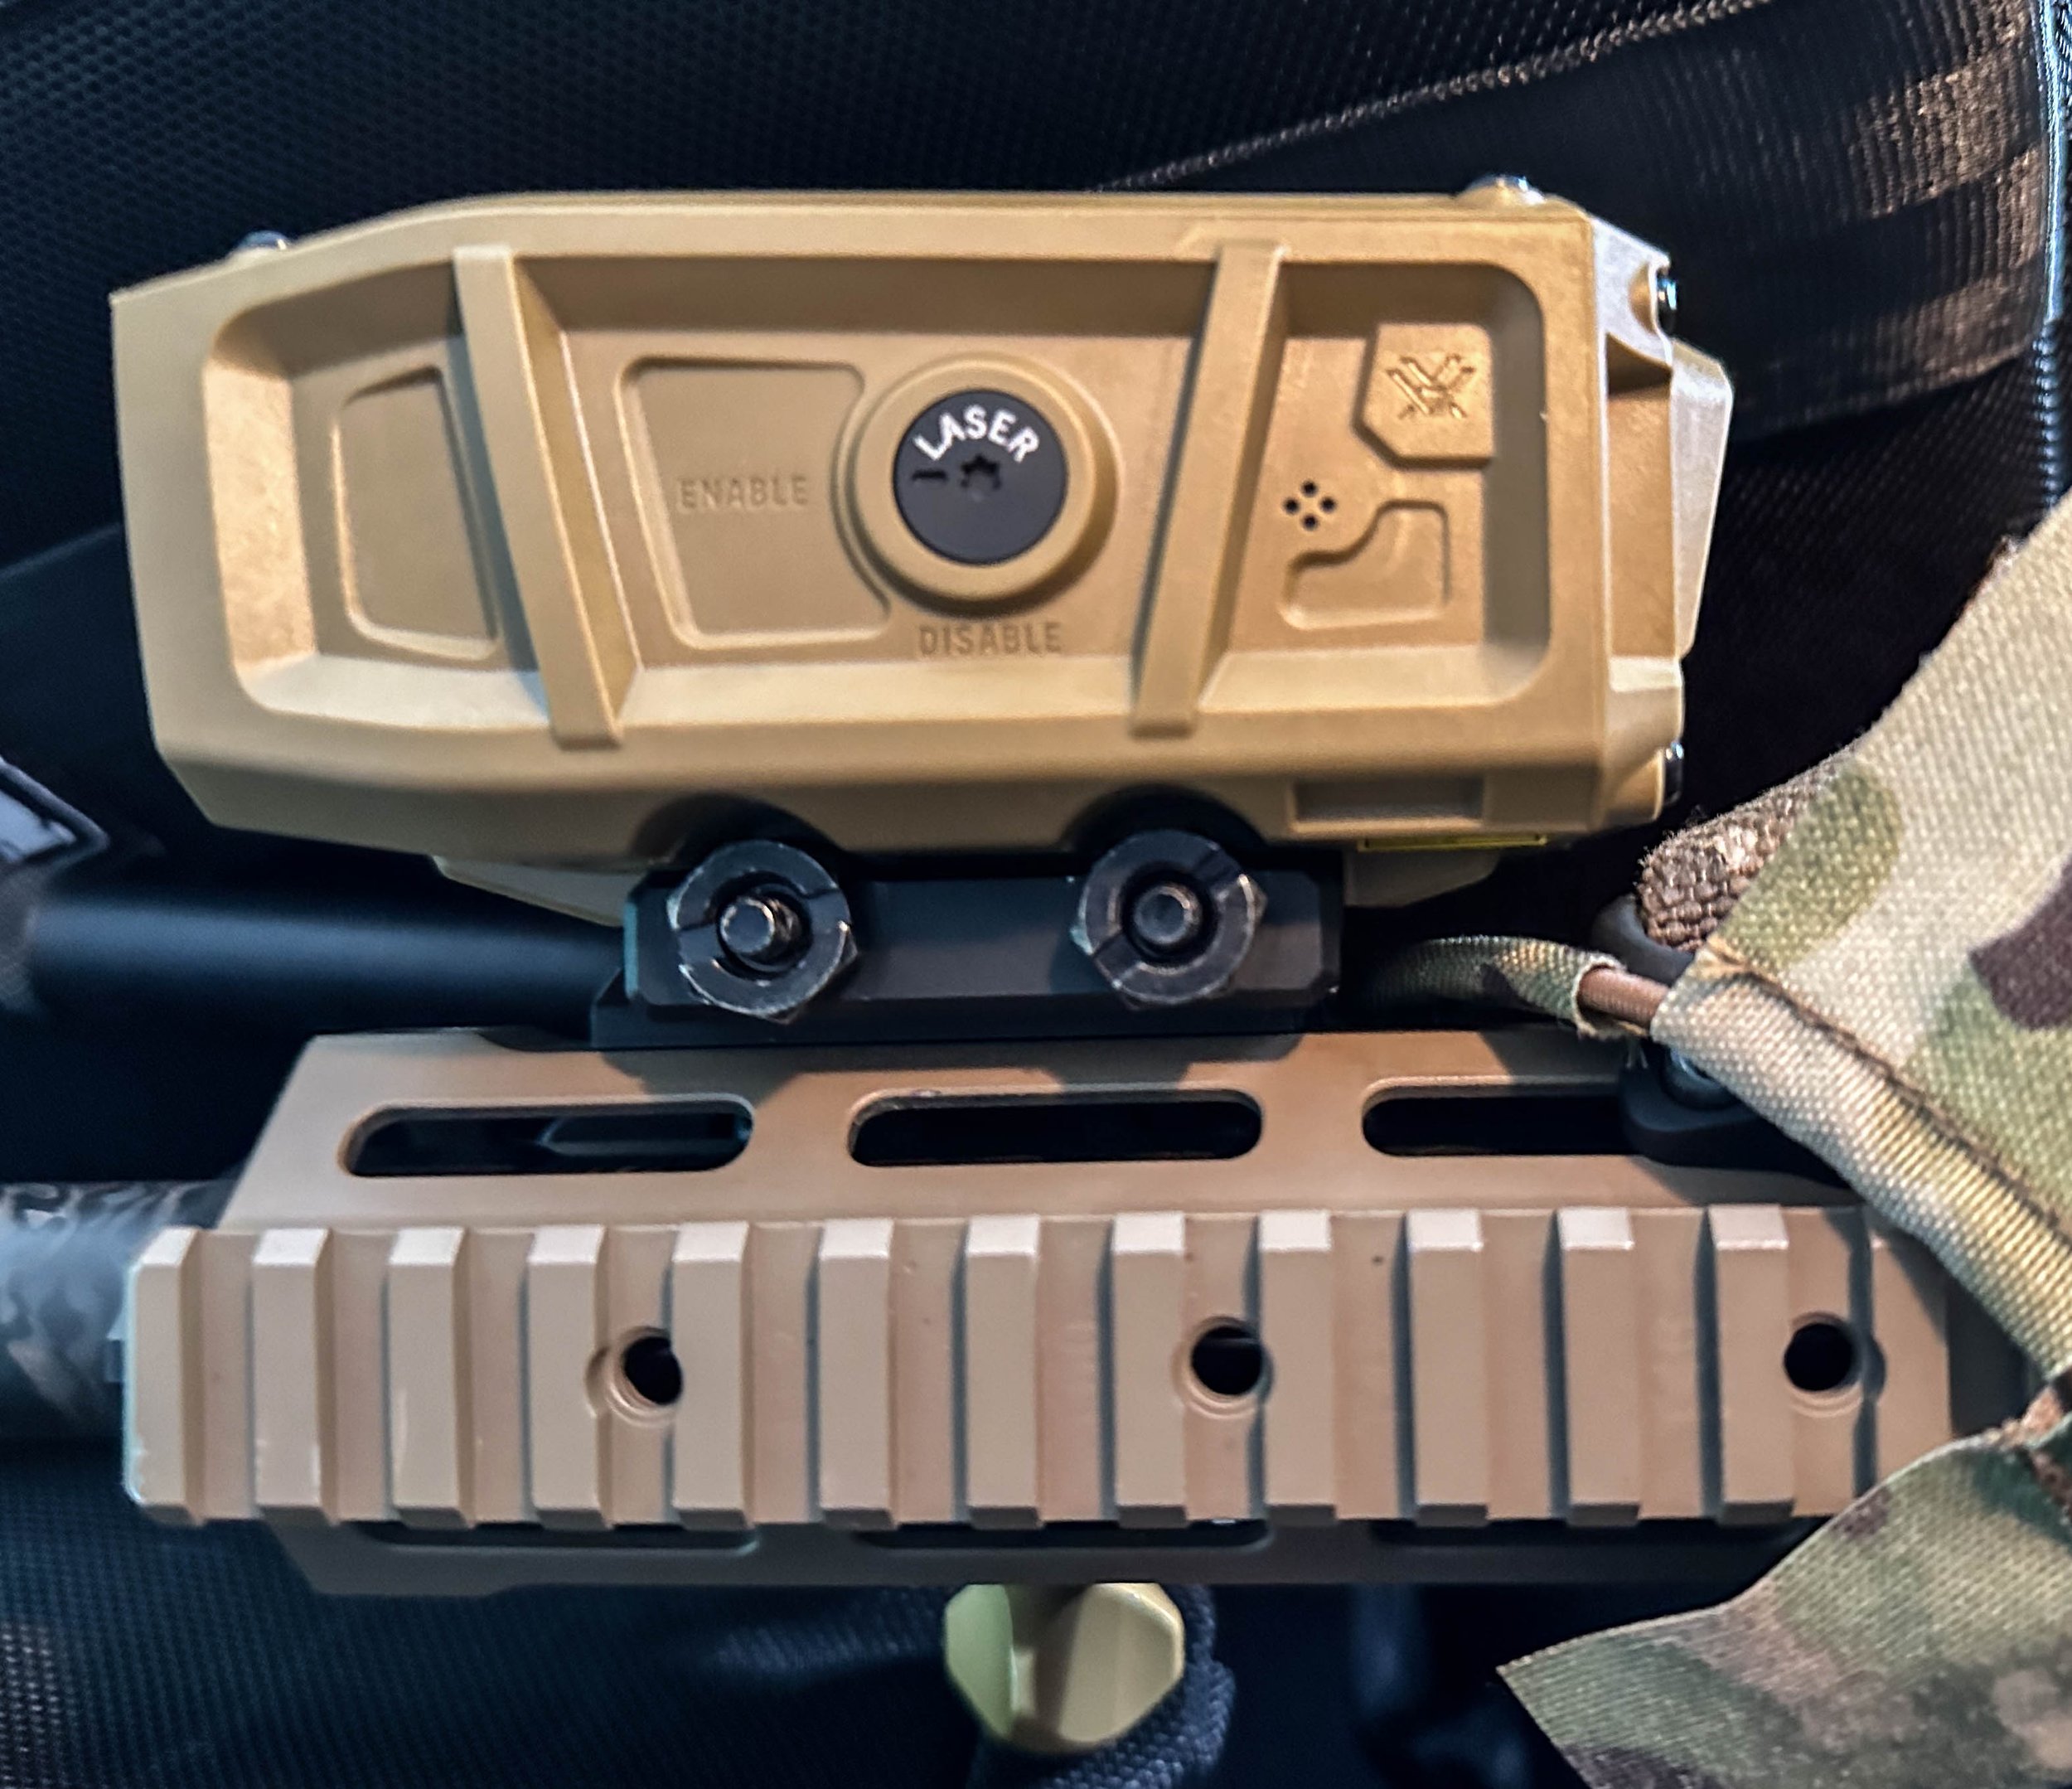
The included M-LOK remote mount went onto the rifle’s rail easily, within reach of support-hand when shooting off a barricade (I’m a southpaw). We’ve been playing around with other mounting points like the magwell too, with the included velcro pieces. That puts the remote within reach of the firing hand.
Sprung latch on the remote mounts securely hold the BT remote in place.
You have to turn the unit on with its own onboard buttons, and the bluetooth remote connects quickly by pressing one of its buttons. Once the LRF shuts off (per whatever sleep timer setting you pick or by manually shutting off), the BT remote blinks to show it is disconnected. I’m planning on taping over the remote’s LED because it gets a bit annoying when shooting after dark.
By not having a Setting button on the remote, you’re forced to reach up to the LRF to do some tasks. I really only used the BT remote for activating scanning and haven’t ended up doing a bunch with the 4-way pad on the remote (for adjusting wind, etc).
The continuous scan mode was helpful to be able to just double-tap the fire button and let the range and ballistic correction live update as you scan around the range.
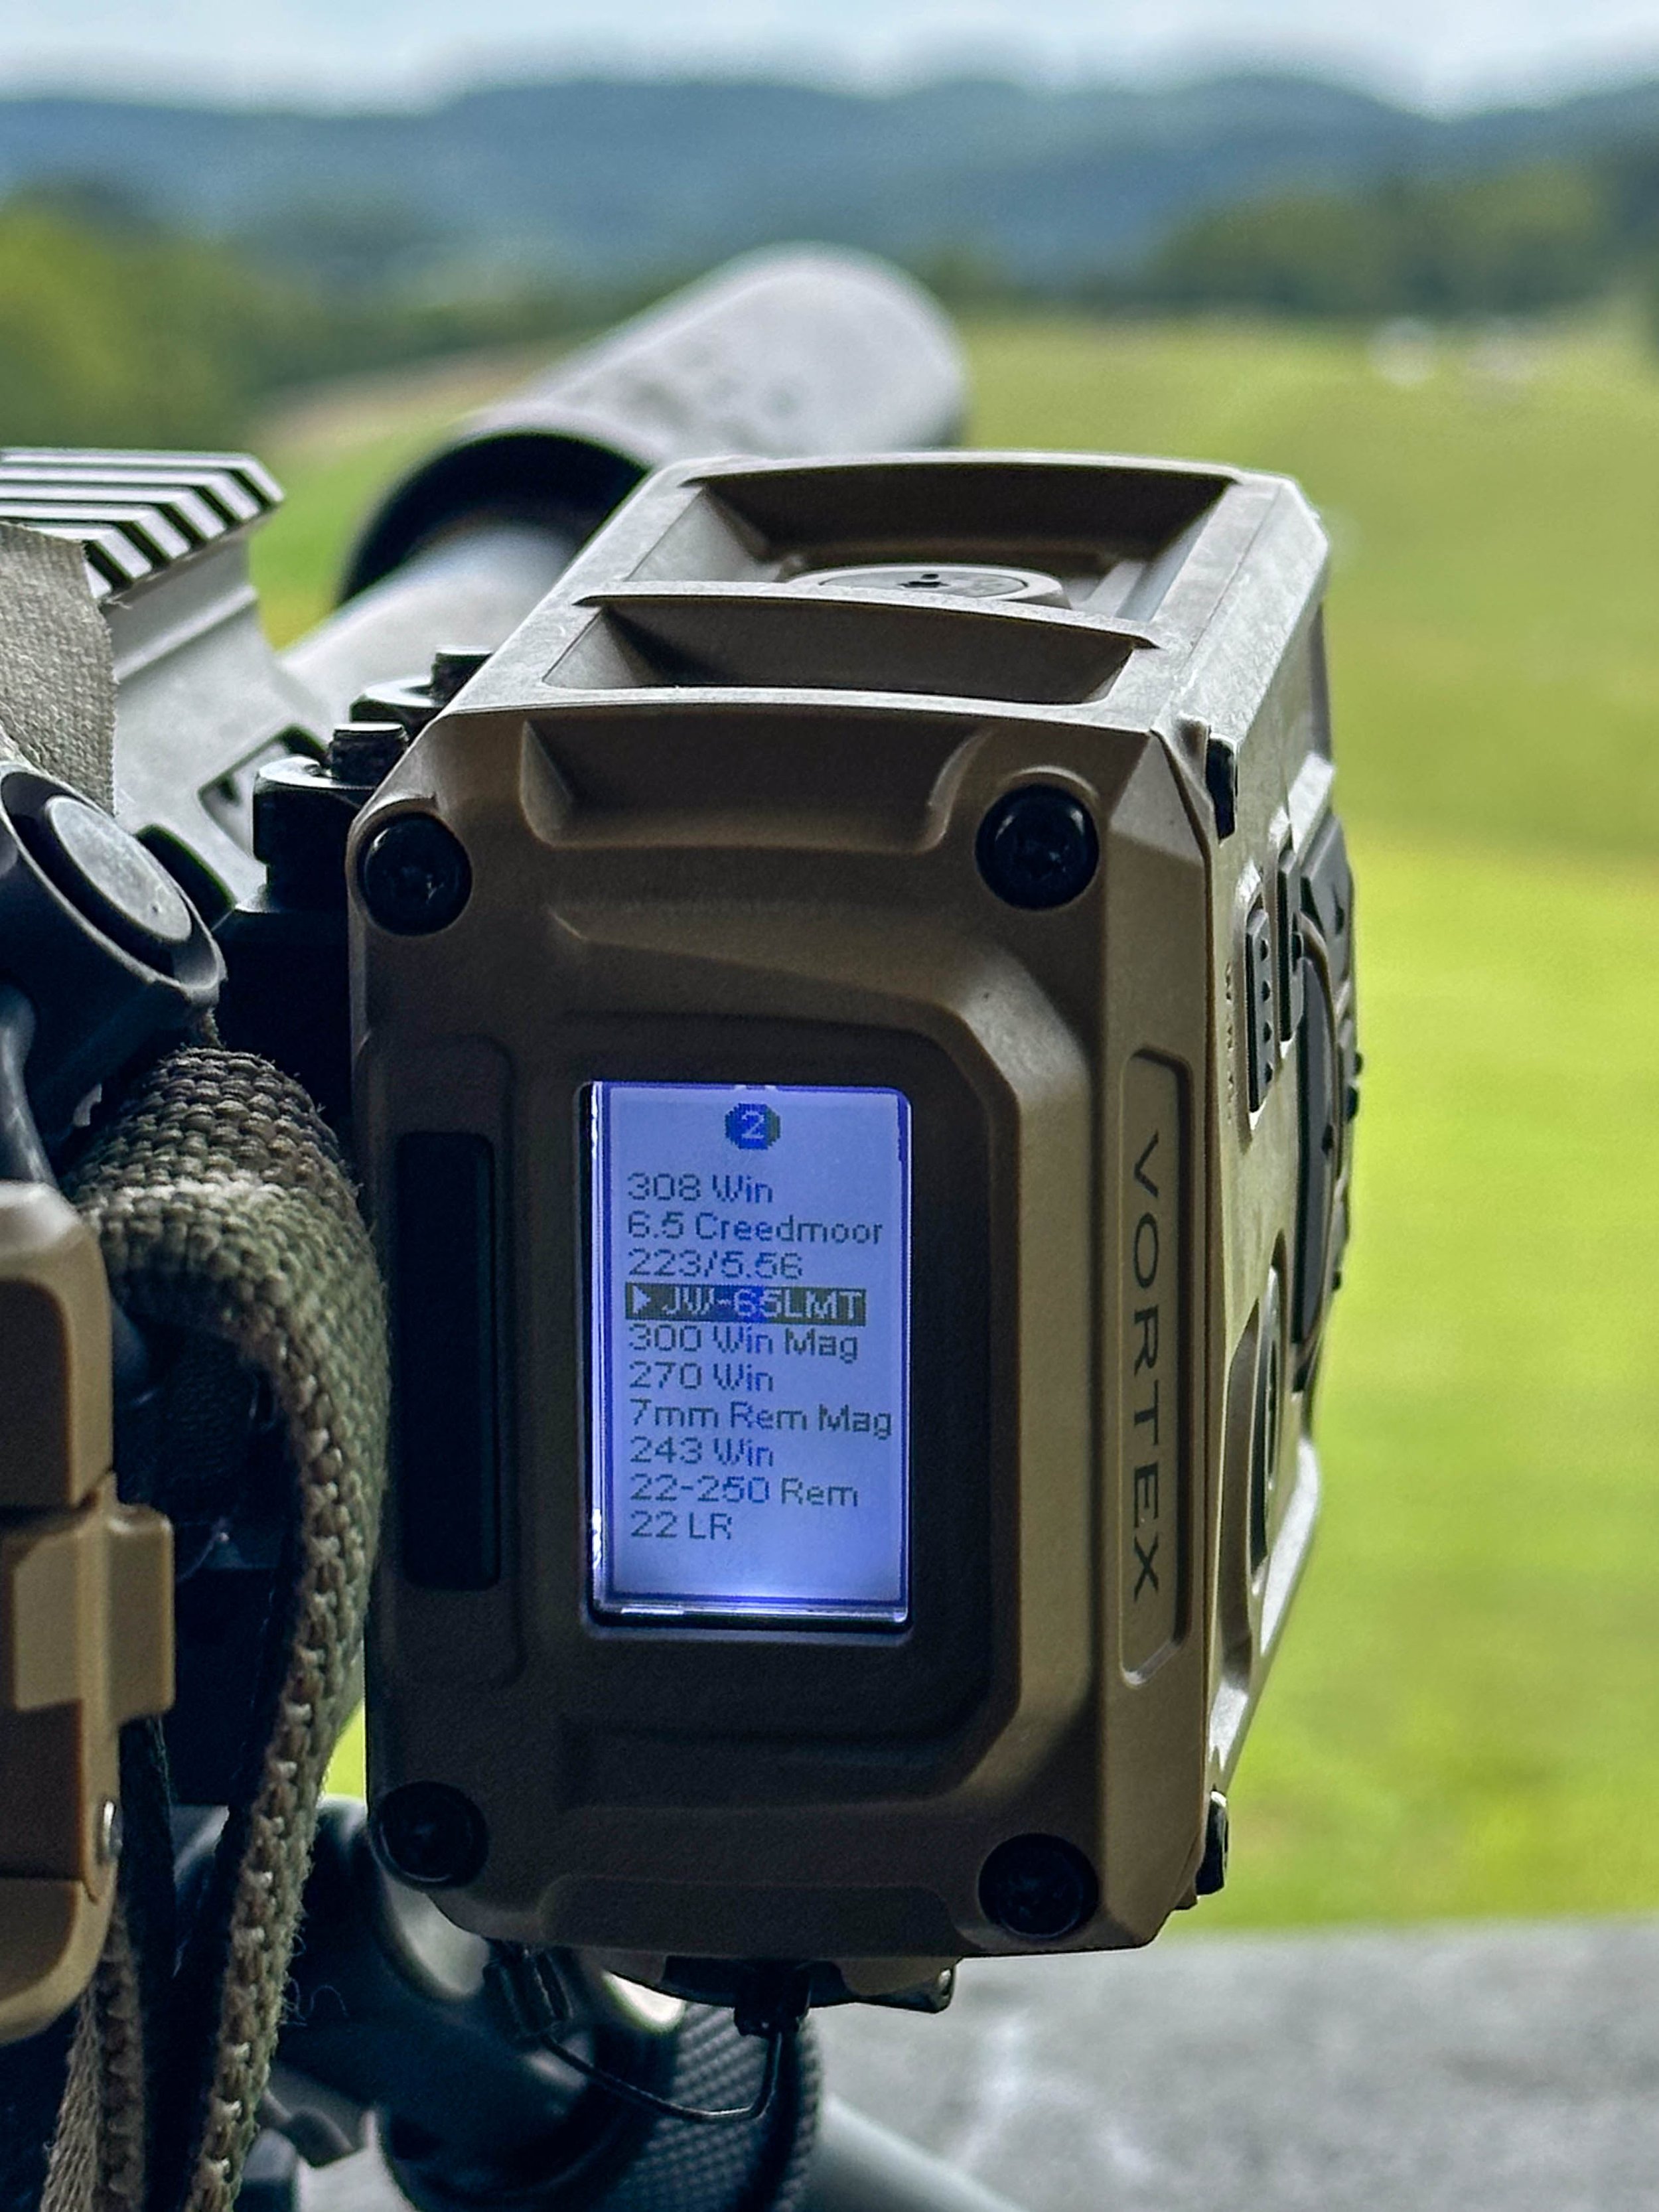
By including a bunch of built in profiles, we were able to see what 22LR might require at extended distances for fun. That was the only time we noticed a bit of a text overflow issue when dealing with 4-figure corrections in inches 😂
Inch drop correction for 22LR
Size. Yep, it’s a big chunky unit - I certainly don’t do product design or electronics engineering so I really can’t comment on how they ended up with the form factor for this one. The MARS-Lc and Wilcox MRF Xe are incredibly tiny in comparison, and the SilencerCo Radius is a bit longer (and has no other sensors or ballistic calculation abilities).
I doubt there’s a TracIR cable in the pipeline, but the limited time spent with the GeoBallistics app leads me to believe the map-driven capabilities over there have some serious potential (being able to quickly share range cards from often-visited properties has become handy already).
If those units are in your price range, their sneaky 1550nm ranging lasers will probably give you quicker returns out further on poorer targets too. They come with a 6x pricetag though…
Impact 4000 alongside the Radius
The display on the Impact 4000 was easy to view in daylight with the backlight turned off, and the brightest setting for the backlight definitely helped for readability when the screen’s not in direct sunlight.
We found the lowest backlight setting to be too bright for night time use with clip-on NV, and wished there was another 2-3 dimmer levels - something that hopefully could come in a software upgrade as the brightness is adjustable in a 5-level menu. Alternatively a neutral-density sticker might be workable to cut the output a bit while still letting the highest setting shine through during the day. The big Backlight button on the rear of the unit was easy to tap to hide the significant glow back on the shooter’s face in the dark.
Significant glow from the backlight, even in its dimmest setting
After swapping to a side-mounted position, we found the Impact 4000 display to be perfectly within the off-eye view while scanning through the scope. I’d recommend giving it a try before investing in a diving board setup for your precision scope. The display also auto-rotates in whatever position it’s mounted.
Side-mounting the LRF also lets you mount an NIR illuminator unit onto the diving board and throw infrared energy downrange with a bit more offset from the muzzle - sometimes reducing white-out from smoke at the muzzle on follow-up shots.
The box includes zeroing targets to dial in the proper offset from center-of-scope to the unit’s center-mounted onboard visible red laser. There’s a bunch of reflective stickers too, for making the red laser glint better in the middle of the day. Otherwise you really have to wait for dusk to be able to see the pointer on the target. Alternatively you could use clip-on NV to see the red laser clearly and walk it onto the center of your reticle, or put the LRF in scan mode and walk the blinking beam in.
Ranging targets included in the box, along with reflective glint stickers
To have the targets work accurately for you at distance, you have to make sure to double-check your diving board, as the included ones are made for the Vortex mount that won’t necessarily match up dimensionally with your setup. My preferred method is to do the zeroing at night at a much further distance (few hundred yards if possible) to ensure close-range inaccuracies don’t stack at distance to put your ranging beam off-target.
The beam pattern of the Impact 4000 appears to be a 45-deg offset bar, wider than expected. Above is what it looks like at 220yd through a T3 reticle. Below is at 700yd:
For mounting, the 1/2” lug nuts are mounted incredibly tight against the round cutouts on the side of the unit, making the included wrench laughable for snugging things up against the bell of an optic. I found a 1/2” socket an absolute requirement for mounting to the manual’s suggested 45in-lbs. I hope there’ll be someone to develop an aftermarket thumbscrew, maybe with a female hex drive and large screwdriver slot for using common Fix It Sticks bits.
In summary, we were really impressed with the ranging performance and the ballistic solutions that the Impact 4000 provided. An accessible price point from this Taiwanese-manufactured device that is even more compelling when you consider it can be the only device you need to bring along. Not having to punch a range into a separate handheld ballistic computer or phone app is such a great upgrade.
I wouldn’t hesitate to recommend Vortex’s latest, unless your budget allows for some of the mil-level 1550nm units, or if someone else is buying your kit for you. I look forward to seeing this ballistic capability proliferate outside of the more tactically-minded shooting sports to hunters and more casual target shooters.
Where to buy? The Impact 4000 is available online from CS Tactical here.